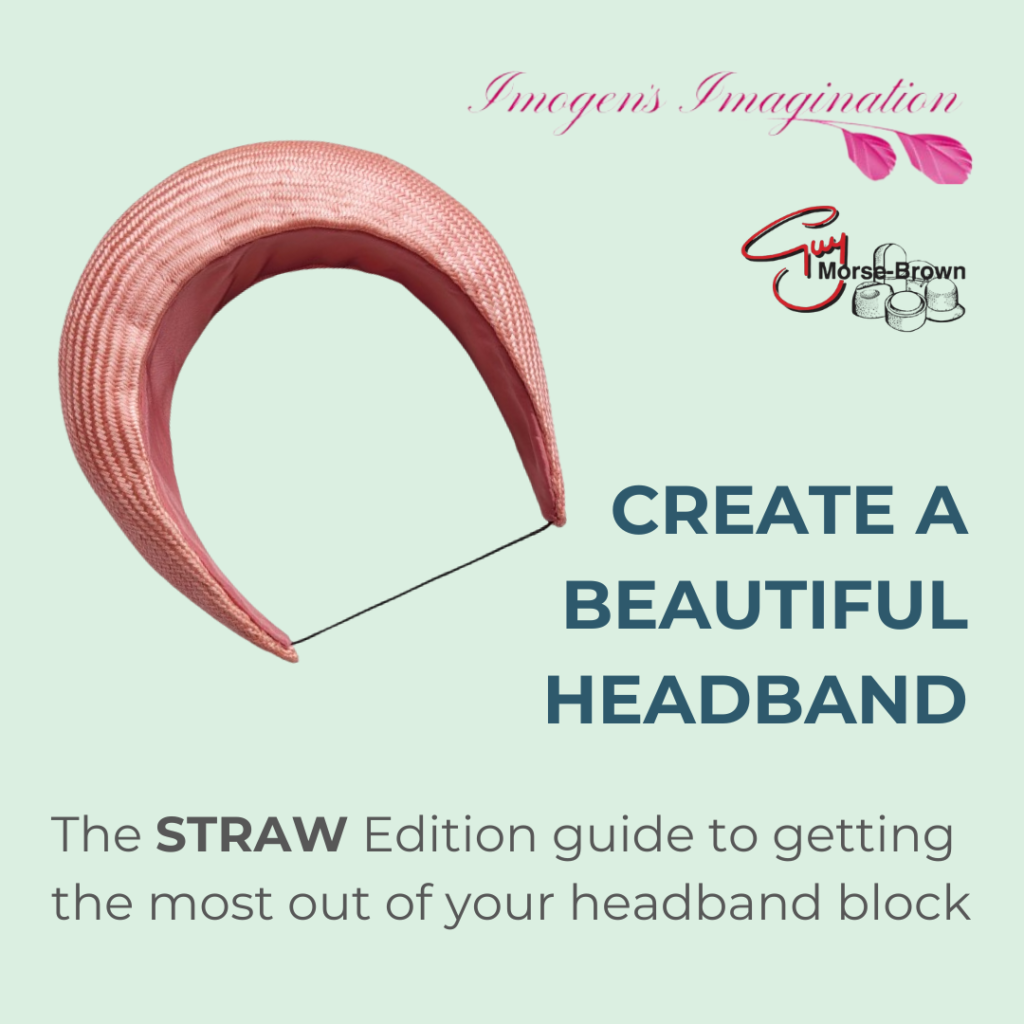
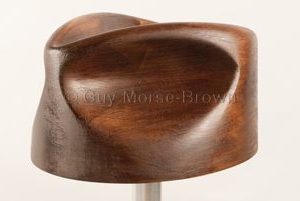
Read this guide to get the best out of your new headband block. This guide (the last of three) shows you how to block a headband with sinamay. The block in the guide is FB81.
We’re thankful to Sophie Cooke of Imogen’s Imagination who has generously shared her knowledge with you to help you create a beautiful headband.
We’ll be answering more of your questions soon! In the meantime if you’re looking for inspiration and millinery projects why not head over to HATalk? With this code GMB20 claim 20% off a new HATalk Subscription.
If you’re hoping to delve deeper and improve your skills then check out Hatcourses.com. There you will find a list of millinery and hat-making courses around the world and available teachers.
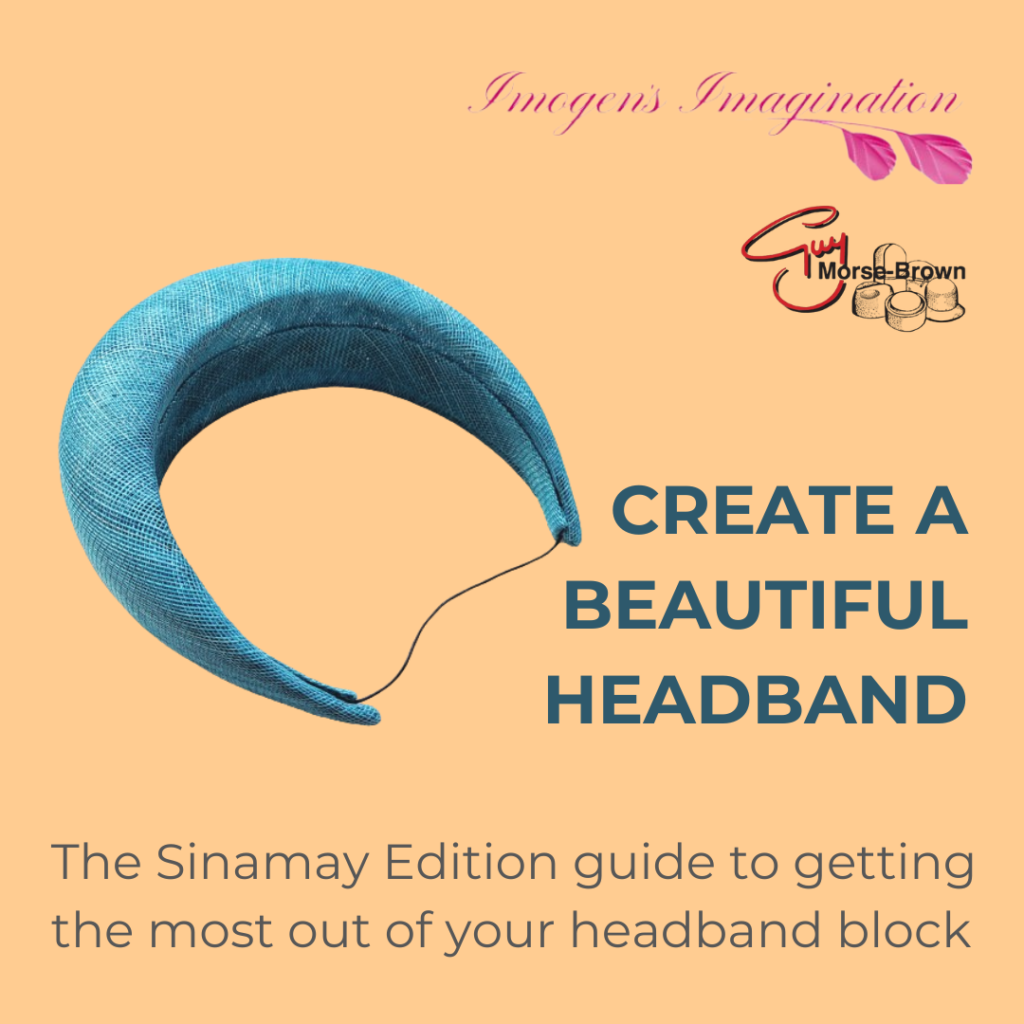
Read this guide to get the best out of your new headband block. This guide (the second of three) shows you how to block a headband with sinamay. The block in the guide is FB81.
We’re thankful to Sophie Cooke of Imogen’s Imagination who has generously shared her knowledge with you to help you create a beautiful headband.
We’ll be answering more of your questions soon! In the meantime if you’re looking for inspiration and millinery projects why not head over to HATalk? With this code GMB20 claim 20% off a new HATalk Subscription.
If you’re hoping to delve deeper and improve your skills then check out Hatcourses.com. There you will find a list of millinery and hat-making courses around the world and available teachers.
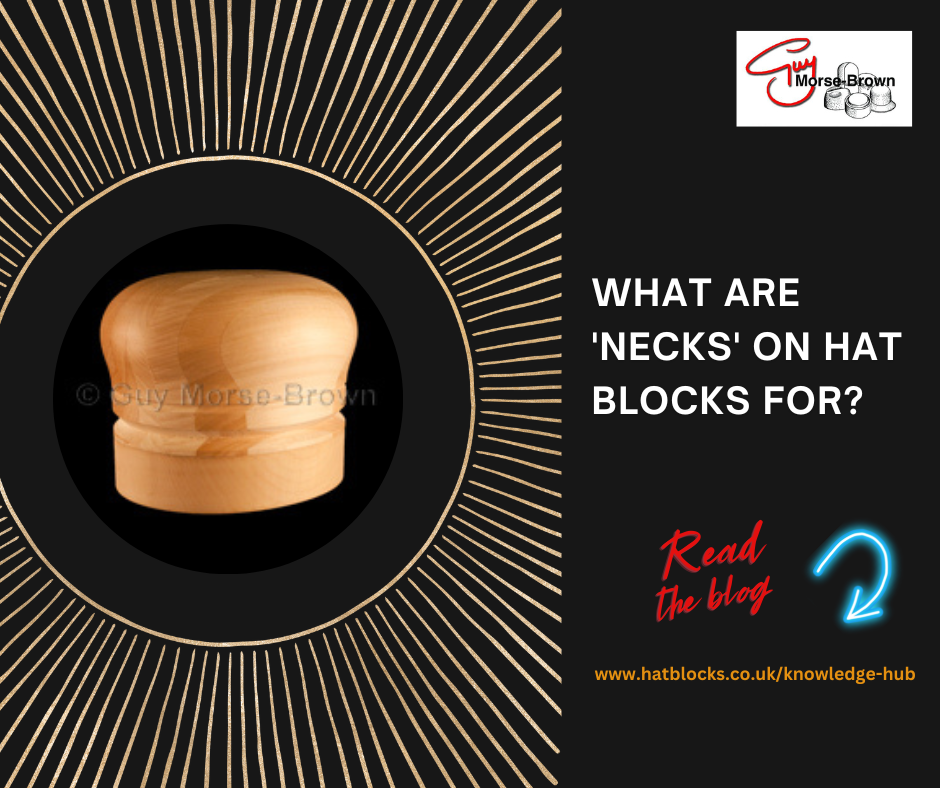
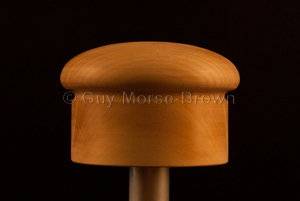
I notice that some hat blocks have ‘necks’. Why is that and what are they for?
Some of the smaller perching beret hat blocks and some cloche blocks have a hollowed underside to allow you to block the material and then fold up inside the hollow and pin to allow you to create a neat finish to your bottom edge.
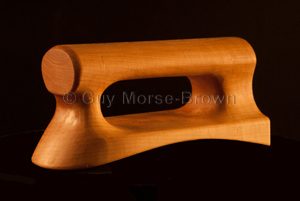
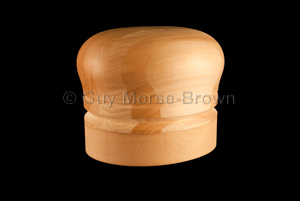
An alternative to the hollowed base on hat blocks is the American-style block with a ‘neck’. When using the FB1A block (pictured below) tie string into the small groove at the base of the shape. Once blocked and dry you can then sew the ribbon just below the fold line. On smaller button hat blocks of this style sewing the ribbon at this stage is much simpler and less fiddly.
FB1A button hat block with a neck
After sewing the ribbon in place you can now flip the ‘neck’ inside. This is a good option where the size of the block does not allow the base to be hollowed easily but is also a great technique on any similar shape of any size.
The CB294F below is a puzzle block to help you remove the blocked hat easily, as the block dismantles inside the blocked hat. It’s worth noting that if you are blocking this shape in felt and tucking under, we recommend you request the size 2cm / 3/4″ larger than the head size to allow for this.
CB294F – puzzle block with neck
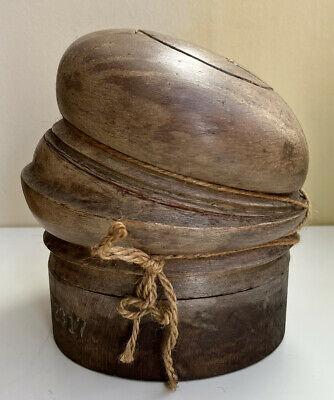
Vintage hat block with neck
Telescopic and Puzzle Blocks with ‘necks’
You will also see plenty of vintage 3D / telescopic puzzle blocks that have a ‘neck’. Note that on these style blocks the size is measured around the neck at the bottom, when the felt is folded inside, this is the head fitting.
We’ll be answering more of your questions soon, in the meantime if you’re looking for inspiration and millinery projects why not head over to HATalk? With this code GMB20 claim 20% off a new HATalk Subscription.
If you’re hoping to delve deeper and improve your skills then check out Hatcourses.com – which houses a list of millinery and hat-making courses around the world and available teachers.
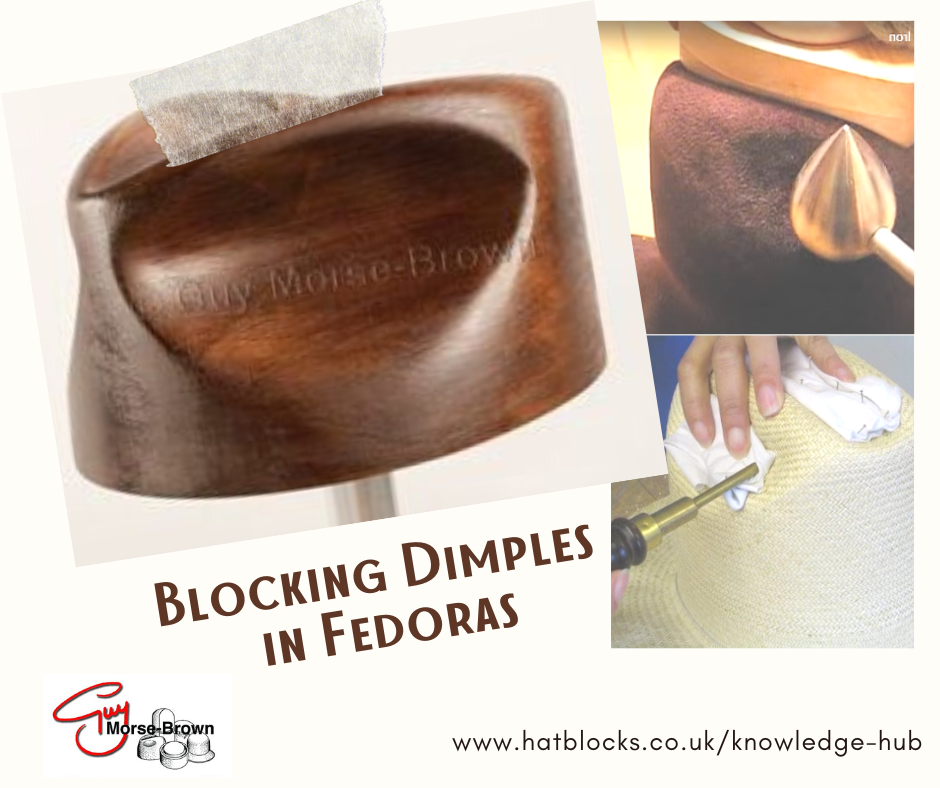
I have a fedora-style hat block with dimples already carved into the block. How do I get my material to take the shape of dimples in the hat block?
Get your material to take the shape of the fedora dimples in your hat block by considering the following. When tackling shaped fedora or trilby blocks with dimples, then it’s a good idea to block on a surface which is slightly lower than normal so you can add your body weight to the process!
This is particularly useful if you’re using heavier men’s felts or wool felts (which are trickier to block). You are also going to need plenty of steam, this will be key to your success.
At the first stage, once your material is most with steam and very hot push the felt down over the crown and persuade it into the dimples with firm strokes of your hands and then pin the material into the base of the crown block as usual. If blocking a fedora in one piece you will have pushed the blocked crown through the brim and pinned it.
Check the material, whether straw or felt, to see that it hasn’t dried out and if necessary, apply more steam.
Roll up some scraps of cotton fabric into a rolled shape to fit the dimples. Press the roll into the dimple, load the pin pusher and pin through the fabric and straw into the block. Pin at either end, then in several places along the dimple, so that the fabric is held firmly in place against the block.
If the fabric tends to rise up the pin, allowing the straw to lift off the block, pin at an angle as shown. Use enough pins to hold the straw evenly against the block. Leave it to dry.
This technique works best with straw capelines. If you’re using felt then read on…
Another great way to get your material to take the shape of fedora dimples
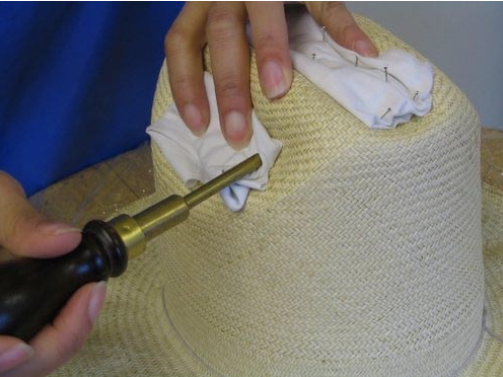
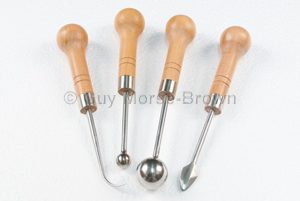
If your budget allows you could invest in an egg iron. Simply warm the egg in a flame or on a hot plate such as your kitchen hob or portable stove and away you go! You’ll find it invaluable for use with fedora dimples and valleys, but the pointed end will also fit well into sharper valleys found in pork pie styles. We made a short demo video of the egg iron in use:
We’ll be answering more of your questions soon, in the meantime if you’re looking for inspiration and millinery projects why not head over to HATalk? With this code GMB20 claim 20% off a new HATalk Subscription.
If you’re hoping to delve deeper and improve your skills then check out Hatcourses.com – which houses a list of millinery and hat-making courses around the world and available teachers.
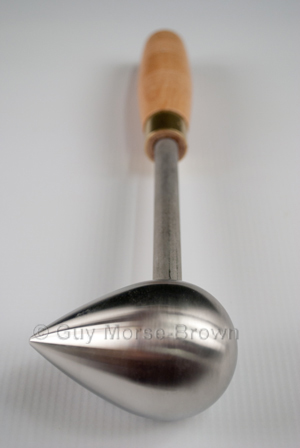
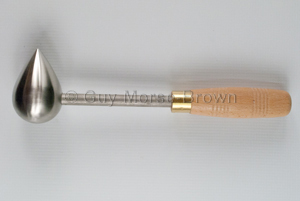
Get your material to take the shape of the fedora dimples in your hat block easily with the help of our egg iron. You can find egg irons here:
Stainless Steel Egg Iron
£80.00
An egg iron is used for helping to shape and smooth felt into hollow areas of a block such as a trilby or fedora. Our egg irons are of superior quality being made of stainless steel that will not rust or corrode, giving you years of trouble and maintenance free service. Simply warm the egg in a flame such as your kitchen hob or portable stove and away you go. You’ll find it invaluable for use with trilby dimples and valleys but the pointed end (which isn’t sharp) will also fit well into sharper valleys such as pork pies.
STAINLESS STEEL MEANS RUST FREE – NO MORE MARKS ON YOUR FELT. NOT YOUR AVERAGE EGG IRON!
Ex VAT £80
If you are not ordering blocks as well, this product can be purchased by clicking “add to cart”. Otherwise, please click “add to quote” to add it to your block quote.
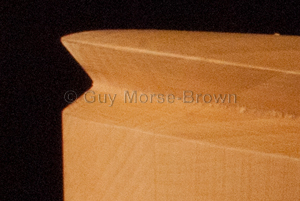
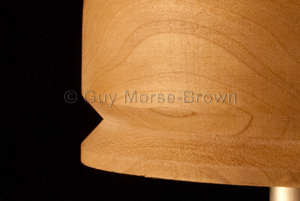
I notice that some hat blocks have string grooves/rope lines and some don’t. How do I know if my hat block needs one or not?
String grooves are sometimes referred to as rope lines. Whether a block has a string groove or not is often down to preferred methods and techniques of working. Nowadays string grooves are seen more frequently and offered as an extra. Sometimes they are included as a standard with the block maker. There are some things to consider when deciding if your hat block needs a string goove.
String groove on brim blockString groove on a crown block
When are string grooves useful?
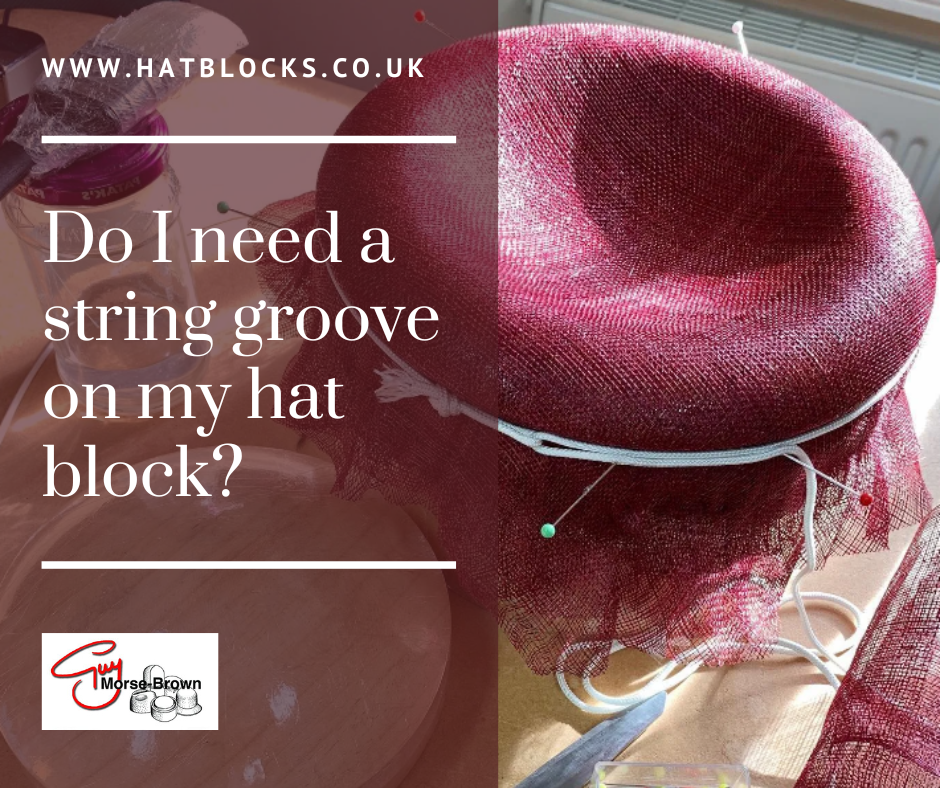
They are particularly useful and time efficient when blocking large brims and saucer-style hats. As with a lot of millinery techniques, pinning the bigger brims is very time-consuming. By tying blocking string/cord into a string groove and securing it with a pin you can save both your time and your stash of pins.
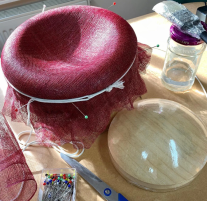
Take a look at this picture on the left. Take your saucer blocks and cover it with sinamay. Once you’ve got the material over the shape of the block tie the string firmly into the string groove. Next, secure the string with a few pins. Finally, if the block has a presser like the one pictured, put that in place with weights on top and leave it to dry.
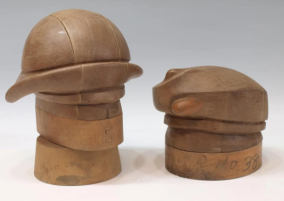
Why do some hat blocks have multiple string grooves?
Vintage hat blocks with string grooves
Some vintage hat blocks, particularly the complex puzzle blocks have multiple string grooves. In this case, the grooves allow the dried felt to be folded and manipulated and sometimes collapsed concertina style into the finished shape. After removing the blocked felt from the puzzle blocks the lines would either serve as a folding guide or leave a marked feature in the material.
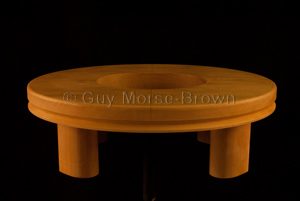
Some 3D blocks also have more than one string groove. The CB191F pictured has a small groove at the bottom of the main shape followed by a ‘gap’ and then a standard string groove. If you tie into both grooves and cut off at the lower one, the resulting neck will flip up inside the top section of the hat and disappear from sight. You can even sew on your ribbon before flipping it up inside, which is very convenient!
3D hat block CB191F with string grooves
Some hat blocks have string grooves included as standard, if you’re unsure ask us!
We’ll be answering more of your questions soon, in the meantime if you’re looking for inspiration and millinery projects why not head over to HATalk? With this code GMB20 claim 20% off a new HATalk Subscription.
If you’re hoping to delve deeper and improve your skills then check out Hatcourses.com – which houses a list of millinery and hat-making courses around the world and available teachers.
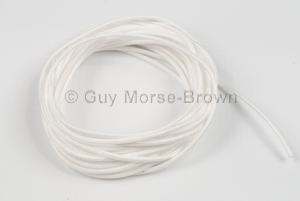
You can find blocking string in our webshop:
Blocking String
£2.50
Great for string grooves and crown bases. 2mm diameter and sold in 5 metre lengths.
Ex VAT £2.50
If you are not ordering blocks as well, this product can be purchased by clicking “add to cart”. Otherwise, please click “add to quote” to add it to your block quote.
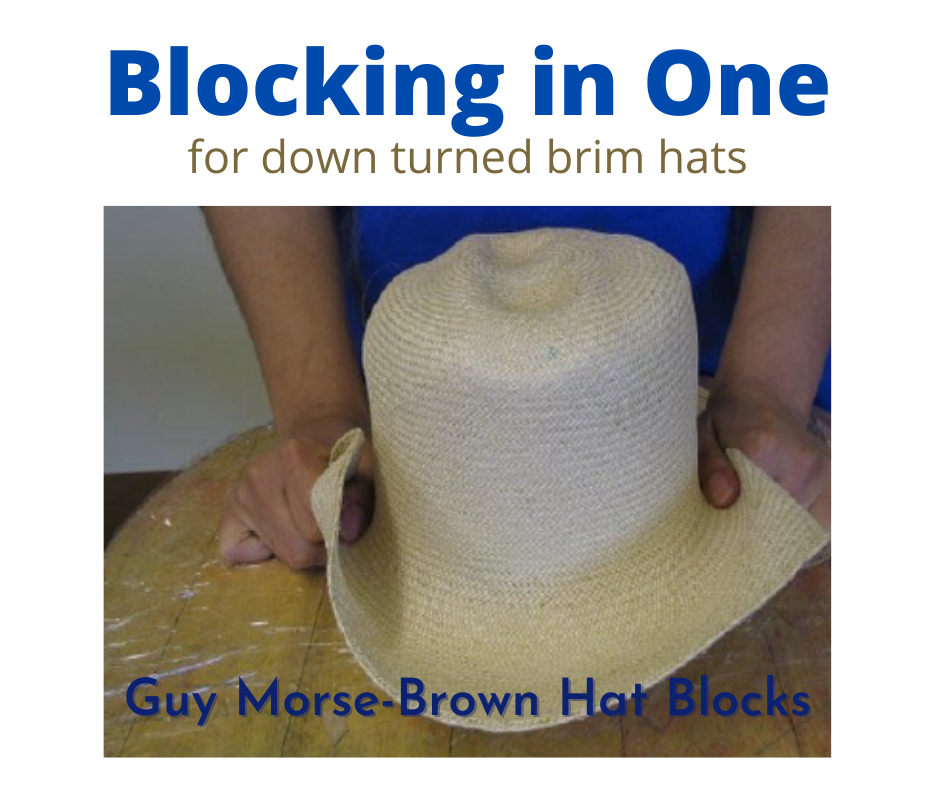
Making hats with a down-turned brim. Can I use the blocking in one technique?
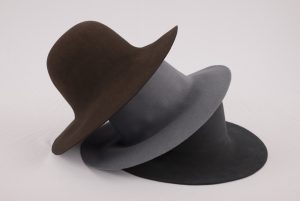
Yes, blocking in one is a common technique for down-turned brim hats. Before the advent of sinamay, felt and straw were the hatters and milliners’ materials. These come partly shaped as cones (hoods) and capelines. For very small-brimmed hats such as cloches, you can use a cone. For larger brimmed hats you can use a capeline. When you block your hat in one, it is made from either a single cone or a capeline to form a one-piece hat. If you want a large brim you must source large capelines. Alternatively, you can consider blocking the crown and brim separately (the crown from a cone, and the brim from a capeline).
Select your blocks
First, you must fix your crown and brim blocks together. As a side note, be careful about which crown block you choose because full height crown blocks are generally taller than you need. This is to allow you to vary the height of your finished crown when blocking separately. We offer a number of options to get the height you need for blocking in one, from exact height crown blocks to Multiblock Tips and varying height Multiblock Extensions.
Cover your chosen brim block with cling film
Tape the cling film securely to the underneath of the block.
Next, cover your chosen crown and either screw or attach to brim with sticky fixers
Stretch your steamed cone / capeline over the crown and brim
Tie blocked cone / capeline at the base of crown block with string
At this point, you may wish you had extra hands! A runner down is a very handy tool used to push your string down the blocked crown into the corner between crown and brim. This could be on a cloche block or any crown/brim combination where you need a well-defined line between crown and brim. Watch the demo below:
Pin brim edge or tie into string groove
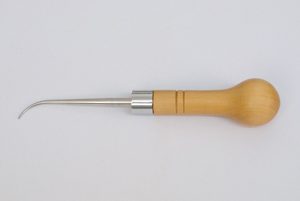
Pictured above is the ingenious Pin Pusher tool. The pin pusher’s wooden handle fits comfortably into the hand and the metal tube into which the dressmaker’s pin is dropped, head first, has a magnet at the bottom. Subsequently, this holds the pin inside so that it does not fall out, whatever the angle of the tool. Dressmaker’s pins can be hard to press into wooden blocks. Using a thimble can be awkward as it easily slips off the pinhead. A pin pusher gives you extra mechanical power! After pinning into place, allow the hat to dry.
Remove the dry finished hat from blocks and stiffen.
Your hat is now ready to put in a sweatband, or a ribbon, and trim as you wish!
We’ll be answering more of your questions soon, in the meantime if you’re looking for inspiration and millinery projects why not head over to HATalk? With this code GMB20 claim 20% off a new HATalk Subscription.
If you’re hoping to delve deeper and improve your skills then check out Hatcourses.com – which houses a list of millinery and hat-making courses around the world and available teachers.
This site uses cookies to enhance your experience, and help us improve our site. If you want to know more about cookies, please click the read more link. Allow CookiesDisable CookiesRead More
Privacy & Cookies Policy
Privacy Overview
This website uses cookies to improve your experience while you navigate through the website. Out of these cookies, the cookies that are categorized as necessary are stored on your browser as they are essential for the working of basic functionalities of the website. We also use third-party cookies that help us analyze and understand how you use this website. These cookies will be stored in your browser only with your consent. You also have the option to opt-out of these cookies. But opting out of some of these cookies may have an effect on your browsing experience.
Necessary cookies are absolutely essential for the website to function properly. This category only includes cookies that ensures basic functionalities and security features of the website. These cookies do not store any personal information.
Any cookies that may not be particularly necessary for the website to function and is used specifically to collect user personal data via analytics, ads, other embedded contents are termed as non-necessary cookies. It is mandatory to procure user consent prior to running these cookies on your website.


 good idea to block on a surface which is slightly lower than normal so you can add your body weight to the process!