Blocking in One Technique – Down Turned Brim

Blocking in one down turned brim

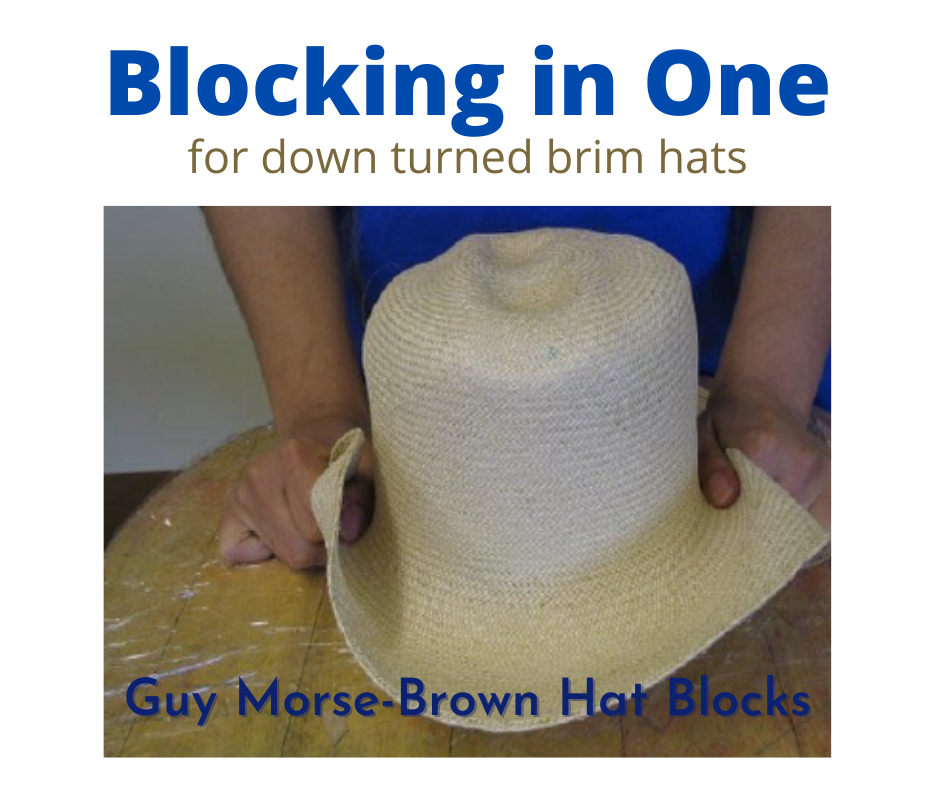
Making hats with a down-turned brim. Can I use the blocking in one technique?

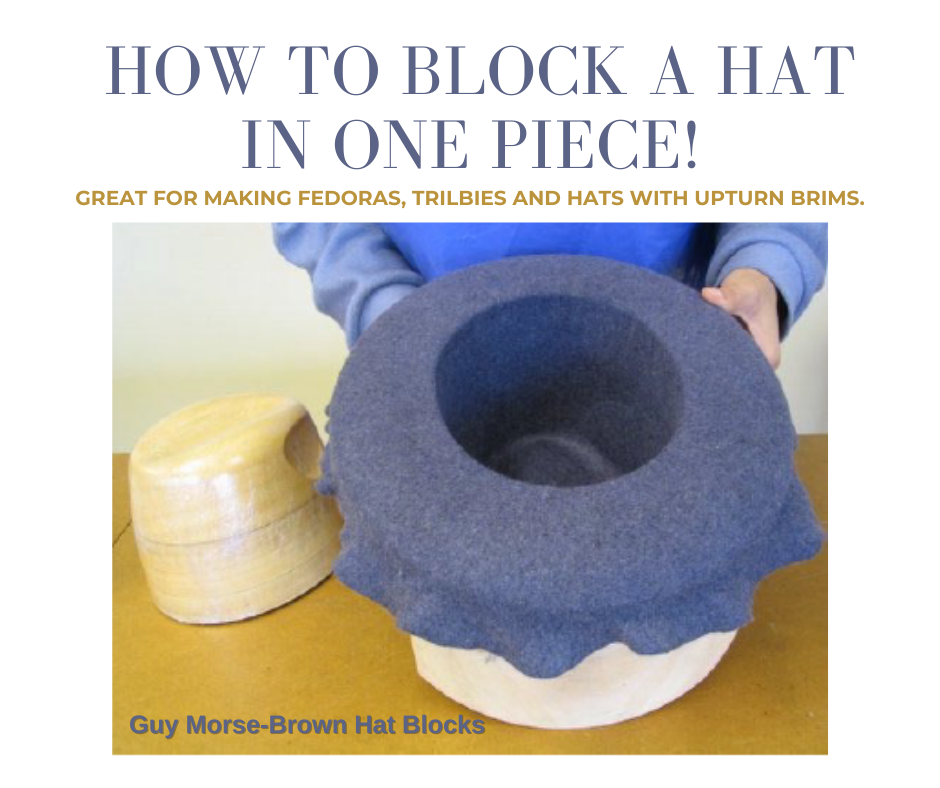
Yes, blocking in one is a common technique for down-turned brim hats. Before the advent of sinamay, felt and straw were the hatters and milliners’ materials. These come partly shaped as cones (hoods) and capelines.  For very small-brimmed hats such as cloches, you can use a cone. For larger brimmed hats you can use a capeline. When you block your hat in one, it is made from either a single cone or a capeline to form a one-piece hat. If you want a large brim you must source large capelines. Alternatively, you can consider blocking the crown and brim separately (the crown from a cone, and the brim from a capeline).

Select your blocks

First, you must fix your crown and brim blocks together. As a side note, be careful about which crown block you choose because full height crown blocks are generally taller than you need. This is to allow you to vary the height of your finished crown when blocking separately. We offer a number of options to get the height you need for blocking in one, from exact height crown blocks to Multiblock Tips and varying height Multiblock Extensions.

Cover your chosen brim block with cling film

Covering your down turned brim block

Tape the cling film securely to the underneath of the block.

Covering the down turned brim block

Next, cover your chosen crown and either screw or attach to brim with sticky fixers

Attaching crown block to brim block for blocking in one

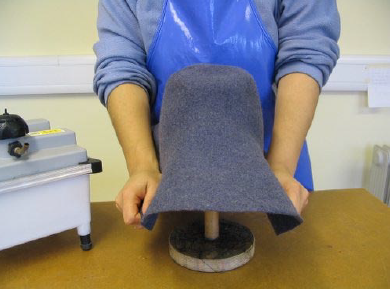
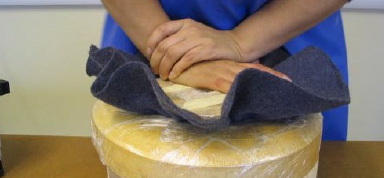
Stretch your steamed cone / capeline over the crown and brim

Stretch capeline over hat blocks for blocking in one

Tie blocked cone / capeline at the base of crown block with string

Tie blocked crown of hat with string

At this point, you may wish you had extra hands! A runner down is a very handy tool used to push your string down the blocked crown into the corner between crown and brim. This could be on a cloche block or any crown/brim combination where you need a well-defined line between crown and brim. Watch the demo below:

Pin brim edge or tie into string groove

Pinning brim edge using a pin pusher for blocking in one

Pictured above is the ingenious Pin Pusher tool. The pin pusher’s wooden handle fits comfortably into the hand and the metal tube into which the dressmaker’s pin is dropped, head first, has a magnet at the bottom. Subsequently, this holds the pin inside so that it does not fall out, whatever the angle of the tool. Dressmaker’s pins can be hard to press into wooden blocks. Using a thimble can be awkward as it easily slips off the pinhead. A pin pusher gives you extra mechanical power! After pinning into place, allow the hat to dry.

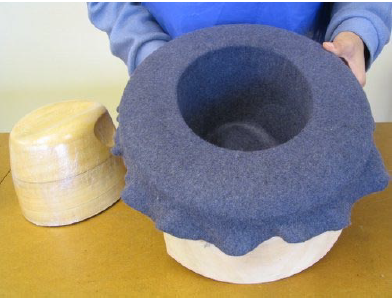
Remove the dry finished hat from blocks and stiffen.

Your hat is now ready to put in a sweatband, or a ribbon, and trim as you wish!

We’ll be answering more of your questions soon, in the meantime if you’re looking for inspiration and millinery projects why not head over to HATalk? With this code GMB20 claim 20% off a new HATalk Subscription.

If you’re hoping to delve deeper and improve your skills then check out Hatcourses.com – which houses a list of millinery and hat-making courses around the world and available teachers.

Making men’s hats – blocking in one with upturn brim

Making men’s hats with an upturned brim. Can I block the crown and brim together in one piece?

You can block a hat in one piece by using either a single cone or a capeline. This technique is called ‘blocking in one’ and is often used when making men’s hats. So, yes this is possible!

Certainly, if you want to make men’s hats with an upturn from straw and felt in one piece, you need a brim block with a central hole in it. We recommend the hole is 3/4 inch (2 cm) larger in head size than the crown block. This allows for 3mm thickness of felt on the crown block that you will push through the hole in the brim block.

This technique is great for making men’s style hats. Select your crown block and the upturn brim block you will pair it with. You might also want to consider a tipper if you are not hand-shaping the pinch. You’ll also benefit from either a set of brim legs or if you have a number of brims to work with, the universal brim stand.

The blocks used to create the hat below are CB141 crown block with a tipper and paired with the BB55 brim block.

Making men's hat - an example of a fedora using the blocking in one technique

Dealing with the crown

Firstly, steam and stretch the felt capeline over the crown block. If you have a tipper, use it to shape the top, placing a weight on it while the felt dries.

Making hats, steaming the felt. Making men's hats, stretching the felt over the crown block.

Shaping the dimples

Secondly, if you have an open crown block you will hand shape the pinch. If you have a shaped crown block you can either pin fabric into the dimples when on the block, or use an egg iron. The video below shows a short demo of the egg iron in use.

Dealing with the brim

Thirdly, press the felt for the brim flat onto the table with the corner between the crown and brim. Secure it tightly with string at the base of the crown. You can iron the brim gently to get it nice and flat. At this stage, you can make the felt look a little nicer by gently sanding it all over with 320 grit sandpaper. Make sure you sand it all in the same direction.

Now the crown is complete and you can cut the brim to your preferred width size, using a set of brim cutting wheels. The hat at the top of this post was cut to 1 1/2″ but you can go up to 3″ with the BB55.  The brim cutting wheels allow you to cut a very smooth and clean edge. They also allow different brim widths to be achieved from the same brim block as the shaping is done after cutting. The little video below shows the brim edge being cut.

Alternatively, instead of using the cutting wheel, shape the brim on the block and tie the felt into the string groove. After it is dry you can cut the excess felt off with scissors.

Sweatbands and Ribbons

At this stage, you can sew in the sweatband and prepare the ribbon if you like. That leaves only the brim shaping to be done.

Finishing the brim

Now, place the hat upside down inside the brim. (as pictured below). Importantly, the brim must be on a stand or have its own brim legs, to elevate your work off the surface. Now tie a cotton sheet over it using the string groove. Pull it nice and tight, spray lightly with water and iron (not too hot). Leave it to dry and remove.

Making men's hats pushing the blocked crown through the brim block. Leaving the felt on the hat block to dry.

Finishing the hat

If you want to flip the front down use a little steam across the front. This allows you to bend the front of the brim down to complete the shape.

Finally, attach the hat ribbon, maybe choose a feather trim to add to the hat and you’re done!

We’ll be answering more of your questions soon, in the meantime if you’re looking for inspiration and millinery projects why not head over to HATalk? With this code GMB20 claim 20% off a new HATalk Subscription.

If you’re hoping to delve deeper and improve your skills then check out Hatcourses.com – which houses a list of millinery and hat making courses around the world and available teachers.